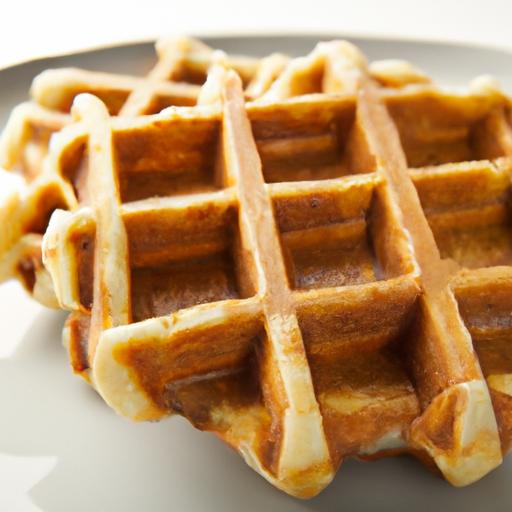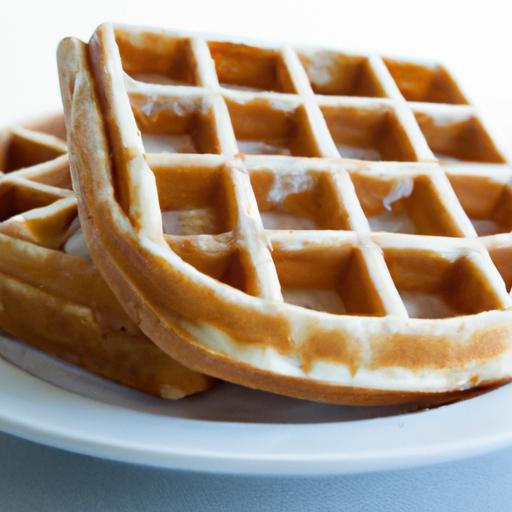
There’s something undeniably magical about biting into a perfectly golden waffle-crispy on the outside, tender and airy on the inside. But for those who live gluten-free, capturing that elusive balance can sometimes feel like a culinary quest. Fear not! Whether you’re new to gluten-free baking or a seasoned pro looking to elevate your brunch game, this guide will unlock the secrets to creating waffles that are not only light and fluffy but irresistibly crispy too. Get ready to transform your kitchen into a haven of gluten-free bliss,where every bite delivers that satisfying crunch without compromise. Welcome to your ultimate guide to crispy and light gluten-free waffles!
Gluten-free waffles can be just as delightfully fluffy and irresistibly crisp as their conventional counterparts when you know how to choose the perfect gluten-free flours and master the art of batter balance.By blending the right flours, incorporating essential tips, and elevating your creations with thoughtful toppings, you’ll create a waffle experience that’s light, airy, and downright crave-worthy every single time.

Prep and Cook Time
- Planning: 10 minutes
- Cooking: 15 minutes
- Total Time: 25 minutes
Yield
Serves 4 waffles (about 2 servings)
Difficulty Level
Easy to Medium: Perfect for home cooks eager to elevate their gluten-free repertoire
Ingredients
- 1 cup gluten-free all-purpose flour blend (make sure it contains xanthan gum or add ½ tsp separately)
- ½ cup almond flour for a tender crumb and subtle nuttiness
- ¼ cup tapioca starch to add crispness and chew
- 2 tbsp coconut sugar (or brown sugar for a deeper caramel note)
- 1 tbsp baking powder (gluten-free)
- ½ tsp baking soda
- ¼ tsp fine sea salt
- 1 cup buttermilk (or almond milk + 1 tbsp lemon juice for dairy-free)
- 2 large eggs, at room temperature
- 4 tbsp melted unsalted butter (or coconut oil for dairy-free)
- 1 tsp pure vanilla extract
Instructions
- Preheat your waffle iron according to the manufacturer’s instructions, lightly brushing with oil or spraying with cooking spray to ensure easy release and crisp edges.
- In a large bowl, whisk together the dry ingredients: gluten-free all-purpose flour blend, almond flour, tapioca starch, coconut sugar, baking powder, baking soda, and salt. This combination ensures a balanced structure that’s both fluffy and crisp.
- In a separate bowl, beat the eggs thoroughly. Add the buttermilk, melted butter, and vanilla extract, mixing until combined.
- gradually pour the wet ingredients into the dry, stirring gently with a spatula until you achieve a smooth, slightly thick batter. Avoid overmixing to maintain lightness-small lumps are okay.
- Let the batter rest for 5 minutes. This step hydrates the flours fully and activates baking powder, contributing to a more airy texture.
- Carefully pour the batter onto your hot waffle iron, spreading evenly. Cook until the waffle is golden brown and crisp-approximately 4-6 minutes depending on your iron. Avoid opening the lid early to preserve lift.
- Transfer waffles to a wire rack, allowing excess steam to escape and keeping the exterior crisp rather than soggy.
- Repeat with remaining batter, reheating the waffle iron between batches if necessary.
Tips for Success with Gluten-Free Waffles
- Choose a blend that balances starches and protein: Combining a gluten-free all-purpose flour with almond flour and tapioca starch achieves a crispy yet tender bite that pure rice flour can’t match.
- Temperature control is key: A hot waffle iron seals the batter quickly for golden crusts without drying out the interior.
- Don’t skip the rest period: This changes the batter from gluey to light and airy by hydrating the flours and activating leaveners.
- Xanthan gum or psyllium husk: If your gluten-free blend lacks binding agents, add ¼-½ tsp xanthan gum to avoid crumbly waffles.
- Make ahead: Waffles freeze beautifully-cool fully, then store in a single layer in an airtight freezer bag for up to 2 months. Reheat in a toaster or oven for crispness.
- Explore liquid substitutes: For vegan versions, swap buttermilk for a plant-based milk with 1 tbsp vinegar and use flax eggs (1 tbsp flaxseed meal + 3 tbsp water per egg).
Serving Suggestions to Elevate every Bite
Take your gluten-free waffles to the next level with inspired toppings that add layers of flavor, texture, and visual appeal:
- Fresh berries and a dollop of whipped coconut cream for a shining, summery touch
- Warm maple syrup and toasted pecans to add sweetness and crunch
- Almond butter and sliced bananas for a nutrient-packed indulgence
- Greek yogurt with honey drizzle and a sprinkle of cinnamon to balance tart and sweet
- For savory lovers: crispy bacon, sliced avocado, and a poached egg crowned with chives
Arrange your waffles on a lovely wooden board or rustic ceramic plates. Garnish with edible flowers or a dusting of powdered sugar for that picture-perfect brunch moment.
| Nutrient | Per Waffle (approx.) |
|---|---|
| Calories | 280 |
| Protein | 7g |
| Carbohydrates | 28g |
| Fat | 15g |

For more tips on gluten-free baking essentials, visit our complete baking guide. You can also explore the science behind gluten-free flours on Celiac disease Foundation. Embrace the journey towards mastering gluten-free waffles that don’t compromise on crispiness or fluffiness-your breakfast table will thank you!
Q&A
Q&A: Crispy & Light – your Ultimate Guide to Gluten-Free Waffles
Q1: Why do gluten-free waffles frequently enough turn out dense or soggy?
A1: Gluten acts like the scaffolding in traditional waffles, giving them structure and a light texture. Without it, gluten-free batters sometimes lack that elasticity, leading to denser, sometimes soggy results. The key is finding the right blend of gluten-free flours and ingredients that mimic that structure while keeping the waffle crispy.Q2: What’s the secret to turning gluten-free waffles crispy on the outside and light on the inside?
A2: It’s all about balancing moisture and structure.Using starches like tapioca or cornstarch alongside gluten-free flours (such as rice, almond, or oat flour) helps create a crisp crust.Adding a bit of fat, like melted butter or coconut oil, enhances browning and crispiness. Also, preheating the waffle iron properly and letting the batter rest for 10-15 minutes can make a big difference.
Q3: Can you recommend a simple flour blend for gluten-free waffles?
A3: Absolutely! Try this basic blend: 1 cup rice flour, 1/4 cup tapioca starch, and 1/4 cup almond flour. The rice flour provides bulk, tapioca starch adds chew and crispness, and almond flour lends flavor and moisture. This trio gives you a light, crispy waffle without weird aftertastes.
Q4: Are there any tricks to keep gluten-free waffles from sticking to the waffle iron?
A4: Yes! Besides using a non-stick waffle iron or a well-seasoned cast iron model, brush the plates lightly with oil or melted butter before adding batter. Also, avoid opening the iron too early-letting the waffle cook fully helps it release cleanly and form a proper crust.
Q5: How can I make gluten-free waffles more flavorful?
A5: Infuse your batter with natural boosters like vanilla extract, cinnamon, nutmeg, or even a splash of citrus zest. Adding mix-ins like fresh berries, chopped nuts, or dairy-free chocolate chips can also elevate the taste. Don’t forget a pinch of salt-it enhances all the other flavors!
Q6: Can I make gluten-free waffles vegan too?
A6: Definitely! Substitute eggs with flax or chia ”eggs” (1 tablespoon ground flaxseed or chia seeds mixed with 3 tablespoons water, let sit until gel-like). Use plant-based milk (almond, oat, coconut) and vegan butter or oil. the texture might be slightly different, but with the right ratios, you’ll still get crispy, light waffles.
Q7: What’s the best way to store leftover gluten-free waffles?
A7: Let them cool completely,then layer with parchment paper in an airtight container and refrigerate for up to 3 days. for longer storage, freeze them flat in a single layer, then transfer to a freezer bag for up to 2 months.Reheat in a toaster or oven to revive the crispiness.
Q8: Any tips for serving gluten-free waffles that wow?
A8: Go beyond syrup! Try savory toppings like avocado and smoked salmon, or sweet combos like ricotta with honey and fresh fruit. Texture contrasts-think crunchy nuts or crispy bacon bits-also amp up the experience. And don’t forget a dusting of powdered sugar or a dollop of whipped cream to finish it off.
Ready to create your perfect batch of crispy, light gluten-free waffles? With the right ingredients and techniques, you can enjoy all the joy of waffles without gluten holding you back!
Closing Remarks
Whether you’re a seasoned gluten-free baker or just beginning to explore the delightful world of allergen-kind treats, mastering the art of crispy, light waffles is a rewarding-and flavorful-adventure. with the right blend of ingredients, a touch of technique, and a sprinkle of patience, your gluten-free waffles can rival, if not surpass, their traditional counterparts in both texture and taste. So next time you’re craving that perfect breakfast bite, remember: gluten-free doesn’t mean compromising on crispiness or flavor.embrace these tips and tricks, and elevate your waffle game to new, golden heights-as everyone deserves a waffle that’s as light as a cloud and as crispy as a dream. Happy waffle making!